Action Bar & Dialogs
In a significant update to the app, we introduce navigation within the app using an Action Bar. This will allow us to create new residences, or navigate to existing ones. Additionally, we will explore a simple date picker dialog to all the user to select a registration date for the residence.
Overview
At the end of this session the following features will have been added:
-
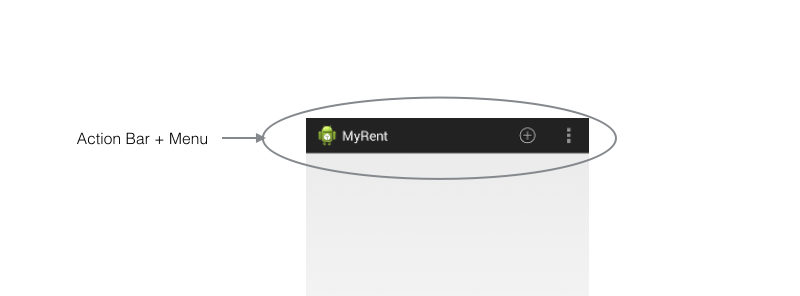
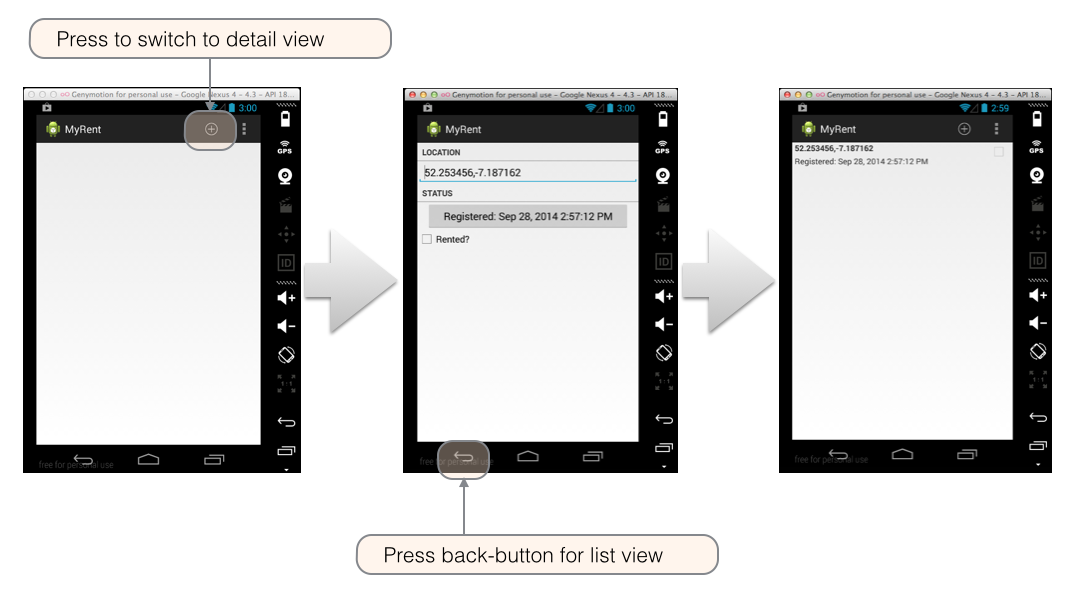
The action bar with menus as shown in Figure 1
-
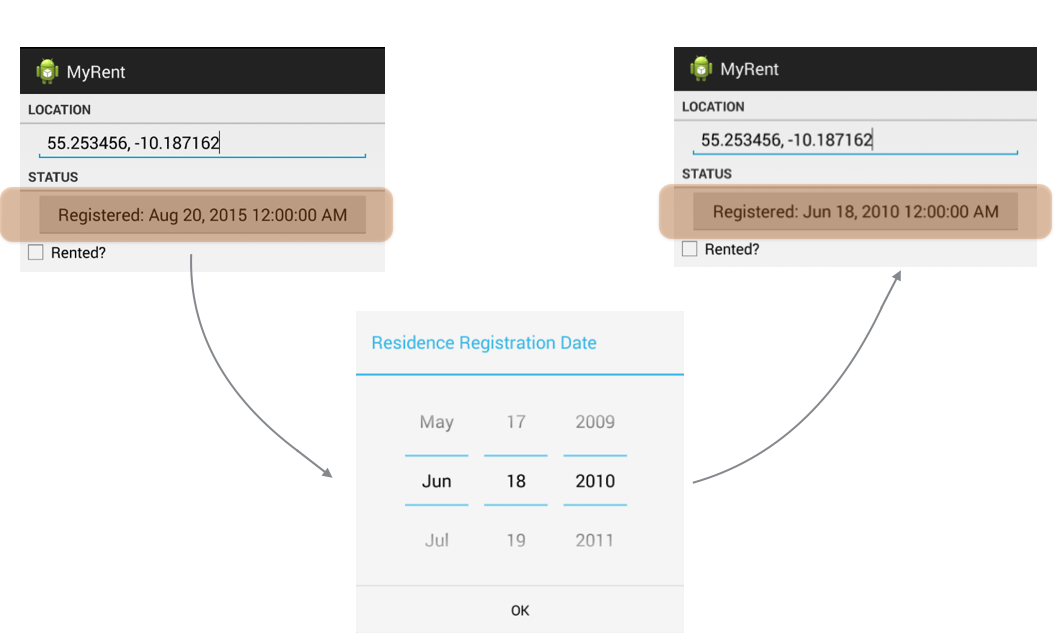
Date picker as shown in Figure 2
Resources
Create a new folder res/menu.
Create a new file res/menu/residencelist.xml.
Here is the file content:
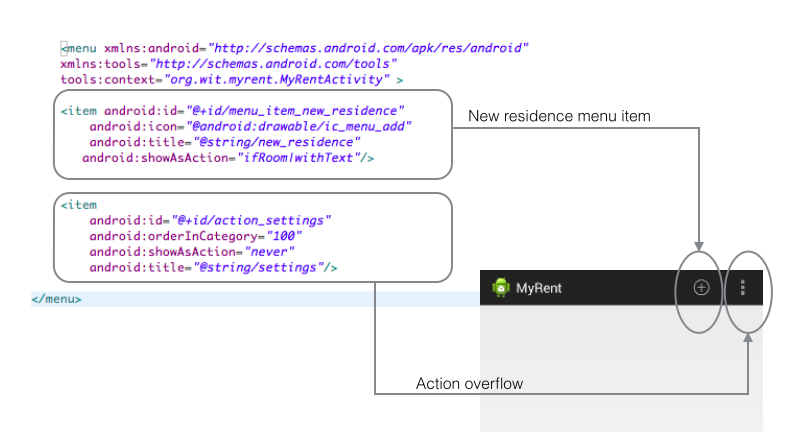
Filename: residencelist.xml
<menu xmlns:android="http://schemas.android.com/apk/res/android"
    xmlns:tools="http://schemas.android.com/tools"
    tools:context="org.wit.myrent.MyRentActivity" >

    <item android:id="@+id/menu_item_new_residence"
        android:icon="@android:drawable/ic_menu_add"
        android:title="@string/new_residence"
       android:showAsAction="ifRoom|withText"/>


    <item
        android:id="@+id/action_settings"
        android:orderInCategory="100"
        android:showAsAction="never"
        android:title="@string/settings"/>

</menu>
Errors will be generated that can be eliminate with the addition of these string resources:
- Add to res/values/strings.xml
  <string name="new_residence">New Residence</string>
  <string name="settings">Settings</string>
Figure 1 shows the relationship between the xml and display.
Helpers
Add a new class named IntentHelper to org.wit.android.helpers.
Filename: IntentHelper.java
package org.wit.android.helpers;
import java.io.Serializable;

import android.app.Activity;
import android.content.Intent;

public class IntentHelper
{
  public static void startActivity (Activity parent, Class classname)
  {
    Intent intent = new Intent(parent, classname);
    parent.startActivity(intent);
  }

  public static void startActivityWithData (Activity parent, Class classname, String extraID, Serializable extraData)
  {
    Intent intent = new Intent(parent, classname);
    intent.putExtra(extraID, extraData);
    parent.startActivity(intent);
  }

  public static void startActivityWithDataForResult (Activity parent, Class classname, String extraID, Serializable extraData, int idForResult)
  {
    Intent intent = new Intent(parent, classname);
    intent.putExtra(extraID, extraData);
    parent.startActivityForResult(intent, idForResult);
  }
}
Activities (ResidenceListActivity)
Here we shall provide the coding to respond to menu selection:
Import the helpers provided in the previous step:
import static org.wit.android.helpers.IntentHelper.startActivityWithData;
import static org.wit.android.helpers.IntentHelper.startActivityWithDataForResult;
In addition it is necessary to import menu-related classes:
import android.view.Menu;
import android.view.MenuInflater;
import android.view.MenuItem;
Override onCreateOptionsMenu in which we inflate the menu that we defined in an earlier step in res/menu/residencelist.xml:
  @Override
  public boolean onCreateOptionsMenu(Menu menu)
  {
    MenuInflater menuInflater = getMenuInflater();
    menuInflater.inflate(R.menu.residencelist, menu);
    return true;
  }
Now override onOptionsItemSelected to respond to selecting the menu item to create a new residence instance:
  @Override
  public boolean onOptionsItemSelected(MenuItem item)
  {
    switch (item.getItemId())
    {
      case R.id.menu_item_new_residence: Residence residence = new Residence();
                                         portfolio.addResidence(residence);
                                         startActivityWithDataForResult(this, ResidenceActivity.class, "RESIDENCE_ID", residence.id, 0);
                                         return true;

      default:                           return super.onOptionsItemSelected(item);
    }
  }
Add this line of code to onItemClick
startActivityWithData(this, ResidenceActivity.class, "RESIDENCE_ID", residence.id);
Delete remaining lines code:

Here is refactored method:
  @Override
  public void onItemClick(AdapterView<?> parent, View view, int position, long id)
  {
    Residence residence = adapter.getItem(position);
    startActivityWithData(this, ResidenceActivity.class, "RESIDENCE_ID", residence.id);
  }
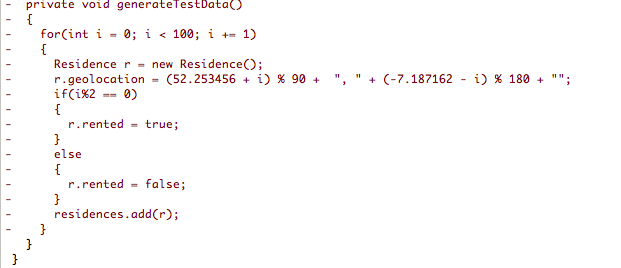
We no longer use test data. Delete this line from Portfolio:

Delete the now redundant method, also in Portfolio: generateTestData
One small final change to org.wit.myrent.models.Residence:
- Add a default value for geoloction in the default constructor:
geolocation = "52.253456,-7.187162";
This will ensure the the residence list will always display some meaningful data.
Here is the modified constructor:
  public Residence()
  {
    id = UUID.randomUUID();
    date = new Date();
    geolocation = "52.253456,-7.187162";
  }
Check that the app works as expected:
- Launch the app and select the menu item (+)
- Optionally, make some changes to the residence data in the detail view
- Switch back to the list view using the back-button.
You should be presented with something similar to that shown in Figure 1.
Dialog
The dialog in Figure 1 is an instance of DatePickerDialog which is a simple dialog containing a DatePicker.
- A DatePicker is a widget for selecting a date.
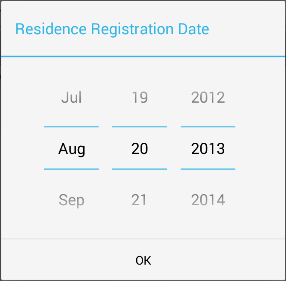
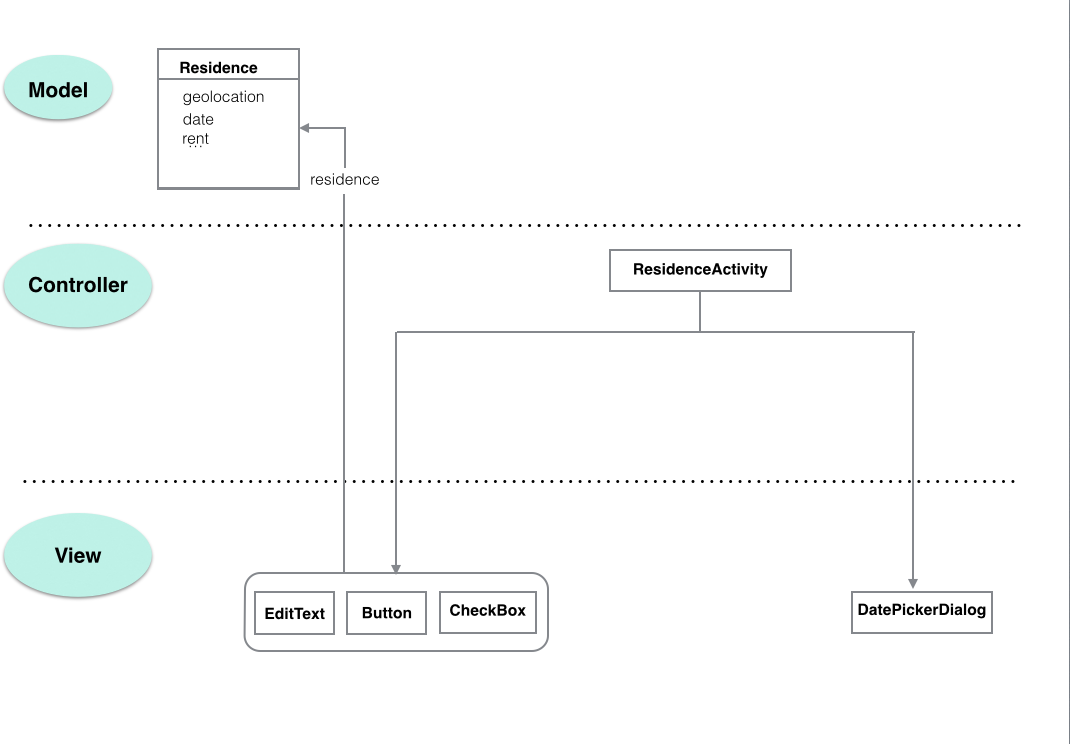
- As shown in Figure 2, the DatePicker is contained in ResidenceActivity.
Activities (ResidenceActivity)
We shall now implement the code to allow a user to set the registration date of a residence.
In org.wit.myrent.activities.ResidenceActivity add these import statements:
import java.util.Calendar;
import java.util.Date;
import java.util.GregorianCalendar;

import android.app.DatePickerDialog;
import android.view.View;
import android.view.View.OnClickListener;
Delete line disabling date button:

Change the signature of ResidenceActivity class by adding
- OnClickListener
- DatePickerDialog.OnDateSetListener
to the list of implemented interfaces:
public class ResidenceActivity extends Activity implements TextWatcher, OnCheckedChangeListener, OnClickListener, DatePickerDialog.OnDateSetListener
This change will trigger errors. Use QuickFix to add unimplemented methods:
- public void onDateSet(DatePicker view, int year, int monthOfYear, int dayOfMonth)
- public void onClick(View v)
Here is the implementation of these methods:
  @Override
  public void onClick(View v)
  {
    switch (v.getId())
    {
      case R.id.registration_date      : Calendar c = Calendar.getInstance();
                                         DatePickerDialog dpd = new DatePickerDialog (this, this, c.get(Calendar.YEAR), c.get(Calendar.MONTH), c.get(Calendar.DAY_OF_MONTH));
                                         dpd.show();
                                         break;
    }
  }
  @Override
  public void onDateSet(DatePicker view, int year, int monthOfYear, int dayOfMonth)
  {
    Date date = new GregorianCalendar(year, monthOfYear, dayOfMonth).getTime();
    residence.date = date;
    dateButton.setText(residence.getDateString());
  }
Set the date button listener in onCreate:
dateButton .setOnClickListener(this);
Launch the app and test that this code works as intended:
- Create a new residence
- Change the registration date
- Return to the list view and create a further residence.
- Return to the list view, click on the first residence, which opens its detail view, and observe that it retains the modified date.